I made a video of the restoration as well, you can see it here:
As you can see in this first set of pictures the Level needed some help, it was dying...
The top level vial was in good shape but the vertical (plumb) vial was broken and missing. The brass was rusty and really dirty. The wood had lots of cracks in it both on the sides and the ends, those will have to be filled in.... Wait maybe for the ends I can add brass plates to help the cracks from getting bigger as well as making it look nicer too. This is the reason I will call this restoration "Better than the Original"... that is if eveything goes as planned of course.
The first thing to do is disassemble the level, as you can see I was able to get all the parts off, at this point I left the top level in so I could plane the bottom and get it level... later on I realized this was flawed thinking but well I learned.
I started planning all the level on all four sides to get down to bare wood.
At this point I took out the top vial, of course I broke it in the process...Damn! Stop everything, go to Amazon and order new parts.... Damn! I can't find the right size shape of vial, what the hell am I going to do? Ebay to the rescue... I found a listing on Ebay that had the vial I needed and his posting had 2 vials... perfect I thought, 2 that way I have an extra incase I break it again or I can make a new level in the future.
As you can see in the picture the planning of the top got rid of the mortise for the brass plate to protect the vial... that will have to be re-cut into the wood.
Using chisels and a router plane I was able to get the mortise back and in place for the brass plate.
At this point I started filling all the cracks with Timber Mate, my favorite wood filler as you probably know by now. After all the cracks were filled we had a little bit of waiting time... Although we have been having a huge heat wave here and well lets just say it didn't take very long to dry. LOL!
While I was waiting for the wood filler to dry I started cleaning all the brass parts, using rust remover and a wire brush.
Then a little buffing at the grinder... I love the way brass shines.
Next I cut the little brass plates for the edges... Oh boy! did I make a mistake and luckily I didn't get hurt. Basically I was trying to cut the brass on my miter saw, but I didn't think to put a back fence to hold it, I thought that double stick tape to a piece of wood would be enough, but the heat made the glue let go and the piece went flying.... I still haven't found that piece of brass....
I made a little safety video of this that you can see here:
Yikes..... ok don't ever do that!!!! Lets move on.
After finally cutting the pieces I drilled holes and countersunk them so I can attach these little plates to the edges of the level.
As you can see there are oversized but that is what I wanted, so I could sand the brass flush to the wood.
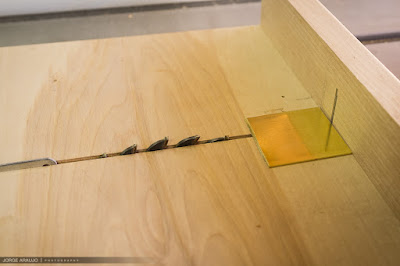
I sanded the brass flush using a large piece of sandpaper glued to my table saw table worked like a charm... I also added small chamfers to all the edges so they would be sharp.
Next I put in the plumb vial and the top and bottom brass discs. Using an acrylic vial will make it much harder to take apart in the future, but then again it probably won't need to be replaced, at least not in my lifetime.
I applied a coat of BLO (Boiled Linseed Oil) and this did not go as well as I had hoped.... the wood took the oil in all different ways... The sides got really dark but the top didn't, the top had a thin strip of sapwood and was so different in color to the sides that it just didn't look very good....Shit! what now?
I used a little Gel Stain in JAVA from General finishes only on the top and the light areas of the sides to get the colors to match better. The great thing about Gel Stain is that you can aplly to just certain areas and it worked great.
Next came a few coats of Shellac and at the end a nice wax buffing. Now for the hard part... how to get the vial attached to the top?
First I was going to need a tool, so I added a little leather lining to these tweezers and I was ready.
I mixed up some Plaster of Paris and using a cheap plastic level under the wood level to tell me if I was putting the vial in level I was able to get it all done. All that was left was to replace the top plate and the project was finished.
Of course this blog post wouldn't be right without some....wait for it.... TOOL PORN!
Thank you.


No comments:
Post a Comment